
Are you constantly bombarded with a barrage of app notifications? Do you feel overwhelmed by the incessant buzzing, beeping, and flashing lights emanating from your phone? Notification overload is a real problem, impacting productivity, focus, and even mental well-being. This guide offers practical solutions to tame notification overload and regain control over your digital life by providing step-by-step instructions on how to disable app notifications on your phone.
Learning how to manage app notifications effectively is crucial in today’s hyper-connected world. From social media alerts to news updates, game requests, and shopping deals, unnecessary notifications can quickly become a major distraction. This comprehensive guide will empower you to disable unwanted notifications, prioritize essential alerts, and customize your notification settings to create a more peaceful and productive mobile experience. Reclaim your focus and minimize distractions by mastering the art of app notification management.
Understanding Notification Categories
Before diving into disabling notifications, it’s crucial to understand how apps categorize them. This knowledge allows for more precise control over what alerts you receive. Different apps use varying categories, but some common types include:
-
Direct Messages/Chats: These notifications alert you to new messages in real-time communication apps.
-
Social Media Updates: These include notifications about new followers, likes, comments, and other social interactions.
-
News and Information: These notifications deliver breaking news, weather updates, or information based on your interests.
-
Reminders and Alerts: These notifications serve as reminders for appointments, tasks, or other scheduled events.
-
Promotional Offers: These notifications advertise sales, discounts, or other promotional content from apps or services.
Familiarizing yourself with these categories empowers you to selectively manage your notification flow more efficiently.
Disabling Notifications from Specific Apps
One of the most effective ways to manage notification overload is to disable notifications from specific apps entirely. This prevents unwanted interruptions and allows you to focus on notifications from apps you deem important.
The process for disabling app notifications is generally similar across different operating systems, but slight variations may exist. Typically, you can access these settings through your device’s main settings menu. Look for a section labeled “Notifications,” “Apps & Notifications,” or something similar.
Once in the notification settings, you’ll see a list of your installed apps. Select the app for which you want to disable notifications. You’ll then be presented with a toggle or checkbox to turn notifications on or off completely. Some operating systems also provide more granular controls within each app’s notification settings, allowing you to disable specific notification categories while leaving others enabled.
By selectively disabling notifications from less critical apps, you can significantly reduce distractions and regain control over your digital well-being.
Customizing Notification Settings for Individual Apps
Beyond simply enabling or disabling all notifications from an app, most modern smartphones offer granular control over notification types for each individual app. This allows you to fine-tune what alerts you receive and helps prioritize important information.
Typically, within your phone’s settings, you can find a dedicated notifications section. From there, you can select individual apps and customize their notification behavior. Common customization options include toggling specific notification categories such as sounds, vibrations, and visual alerts.
For example, you might choose to receive silent notifications for news updates, vibrating alerts for direct messages, and both audible and visual notifications for critical email alerts. This level of customization helps you stay informed without being constantly bombarded by irrelevant notifications. Explore the notification settings for your frequently used apps to discover the customization options available.
Using Do Not Disturb Mode Effectively
Do Not Disturb mode is a powerful tool for temporarily silencing notifications and creating a focused environment. It allows you to mute calls, alerts, and notifications while still allowing certain exceptions to break through. This is ideal for meetings, important work sessions, or when you simply need some uninterrupted time.
Activating Do Not Disturb is typically accomplished through your phone’s quick settings menu. Look for an icon resembling a crescent moon or a prohibition sign. A simple tap usually toggles the mode on or off. Once activated, most audible notifications will be silenced.
Configuring exceptions is key to using Do Not Disturb effectively. You can often choose to allow calls from specific contacts, such as starred contacts or family members. Repeated calls from the same number within a short time frame can also be allowed, ensuring urgent calls get through. Additionally, you can typically allow alarms to bypass Do Not Disturb, ensuring you won’t miss important reminders or wake-up calls.
Scheduling Do Not Disturb Mode for Uninterrupted Periods
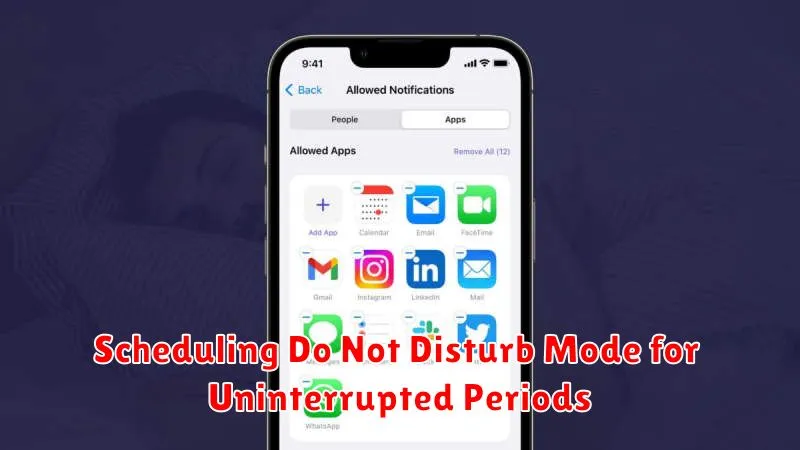
Take control of your time by scheduling Do Not Disturb mode. This allows you to automate quiet periods, ensuring uninterrupted sleep, focus time, or important events. Instead of manually enabling and disabling the mode, set a recurring schedule.
Most phones offer options to schedule Do Not Disturb for specific days of the week and times. For example, you can schedule it to activate automatically every night before bed and deactivate when you wake up. This prevents notifications from disturbing your sleep.
You can also set schedules for specific events. Going into a meeting? Schedule Do Not Disturb for the duration. This ensures you won’t be interrupted by distracting notifications. Remember to adjust your settings based on your individual needs and preferences.
Setting Notification Priority Levels
Beyond simply enabling or disabling notifications, most modern smartphones offer granular control through notification priority levels. This feature allows you to categorize app notifications based on their importance, dictating how they interrupt you.
Typically, priority levels range from urgent (making sounds and popping up on screen) to low (appearing silently in the notification shade). Some systems may also include levels for medium priority or those that minimize sound and visual interruptions.
By assigning appropriate priority levels, you can ensure that critical alerts, such as security warnings or messages from designated contacts, command your immediate attention. Less time-sensitive notifications, like social media updates, can be relegated to a lower priority to minimize distractions.
Access notification priority settings within your phone’s settings menu, usually under “Apps & Notifications” or a similar category. From there, you can individually adjust the priority level for each app installed on your device.
Creating Notification Channels for Granular Control
For more refined control over your notifications, utilize notification channels. Available on Android devices running Android 8.0 (Oreo) and later, notification channels allow apps to categorize their various notification types. This means you can customize how each type of notification from a single app behaves, rather than treating all notifications from that app the same.
For instance, a social media app might have separate channels for direct messages, mentions, newsfeed updates, and friend requests. You can then individually choose whether each channel’s notifications produce sound, vibrate, appear on the lock screen, or even appear at all. This granular control allows you to prioritize what truly matters and silence less important notifications.
To access notification channels, typically navigate to your device’s settings, find the “Apps & notifications” section, select the app you want to manage, and then tap “Notifications.” You should see a list of the available notification channels for that app. From there, you can adjust the settings for each channel as desired.
Managing Lock Screen Notifications for Privacy
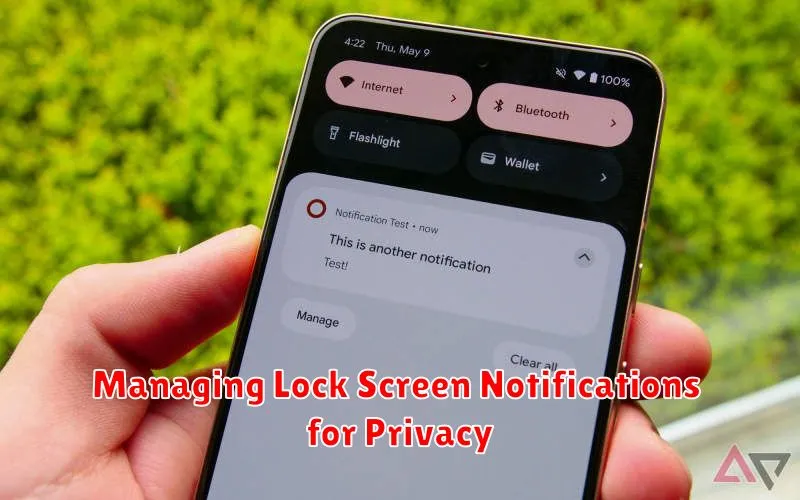
Lock screen notifications can be convenient, but they can also expose sensitive information if not managed carefully. Controlling which apps can display notifications on your lock screen is crucial for maintaining your privacy.
Your phone’s settings allow you to customize how notifications appear on your lock screen. You can typically choose from options like showing full notification content, hiding sensitive content, or only displaying the app icon without any details.
Consider the potential privacy implications of each app’s notifications. For example, you might want to hide content from messaging apps or financial institutions, while allowing calendar or weather updates to display fully.
By carefully configuring your lock screen notification settings, you can strike a balance between convenience and privacy, ensuring that your personal information remains protected.