
Maintaining a clean charging port is crucial for the optimal performance and longevity of your phone. A dirty charging port can lead to a variety of issues, including slow charging, intermittent charging, or even a complete inability to charge. Dust, lint, and other debris can accumulate in the port, obstructing the connection between your phone and the charging cable. This comprehensive guide, “Sparkling Clean: The Ultimate Guide to Cleaning Your Phone’s Charging Port,” will provide you with the knowledge and techniques to effectively clean your phone’s charging port and prevent future charging problems.
Learn how to safely and effectively remove dirt, lint, and other debris from your phone’s charging port. This guide will cover various cleaning methods, from using a soft-bristled brush to utilizing compressed air, ensuring your phone’s charging port remains sparkling clean. By following these simple steps, you can ensure a strong connection between your charging cable and your phone, promoting efficient charging and preventing potential damage. Master the art of charging port cleaning and keep your phone powered up reliably with “Sparkling Clean: The Ultimate Guide to Cleaning Your Phone’s Charging Port.”
Understanding the Importance of a Clean Charging Port
Your phone’s charging port is a critical component, responsible for powering your device and enabling data transfer. A clean charging port ensures a reliable connection between your phone and the charging cable.
Over time, dust, lint, and other debris can accumulate in the charging port. This buildup can obstruct the connection, leading to slow or intermittent charging. In some cases, a blocked port can prevent your phone from charging altogether.
Regular cleaning of your phone’s charging port is essential for maintaining its functionality and extending its lifespan. By removing debris, you ensure a strong and consistent charge, preventing potential damage to the charging port and your device.
Gathering the Necessary Cleaning Tools
Before you begin cleaning your phone’s charging port, it’s crucial to gather the right tools. Using inappropriate tools can cause damage, so stick to these recommended items.
A soft-bristled brush is the primary tool for this task. An unused toothbrush, a soft paintbrush, or a dedicated electronics cleaning brush are excellent choices. Avoid brushes with metal bristles as they can scratch and damage the delicate contacts within the port.
Compressed air in a can is highly effective for dislodging stubborn particles. Ensure the can has a straw extension for precise airflow. Never use a vacuum cleaner as the suction can be too powerful.
A bright light source, such as a flashlight or desk lamp, will help you clearly see inside the charging port and identify any debris.
Optionally, a magnifying glass can provide a closer look, especially for inspecting smaller ports.
Powering Off Your Device
Before initiating any cleaning procedure on your phone’s charging port, it’s crucial to power off the device completely. This precautionary step safeguards your phone from potential electrical damage and ensures a safer cleaning process. Failing to power off your device before cleaning could lead to short circuits or other electrical malfunctions.
To power off your device, locate the power button, typically found on the side or top of your phone. Press and hold the power button until the power-off menu appears on your screen. Select the power off option. Once the screen goes black and the device is no longer vibrating or emitting any sounds, you can proceed with the cleaning process.
Gently Removing Debris with a Soft Brush
Once you have your soft-bristled brush, it’s time to carefully remove debris from your phone’s charging port. Avoid using metal tools as they can scratch and damage the delicate contacts within the port. A soft, anti-static brush, such as a toothbrush with extra-soft bristles or a specialized electronics cleaning brush, is ideal.
Insert the brush gently into the charging port. Avoid applying excessive force. Use a light, circular motion to dislodge any dust, lint, or debris trapped inside. It’s crucial to be patient and thorough during this process. Pay attention to the port’s edges where debris tends to accumulate.
After a few rotations, remove the brush and check for any dislodged particles. You can use a flashlight to illuminate the port for better visibility. If necessary, repeat the process until you’ve removed as much debris as possible with the brush.
Using Compressed Air for Stubborn Particles
For particles that resist removal with a soft brush, compressed air can be a highly effective solution. A short burst of air can dislodge debris stuck within the charging port. However, it’s crucial to use compressed air correctly to avoid damaging your device.
Always hold the can upright and a safe distance from the charging port, typically around four to six inches. A tilted can may release propellant which can damage the internal components of your phone. Use short bursts of air rather than a continuous stream. This prevents moisture buildup and minimizes the risk of pushing debris further into the port.
It’s important to use canned air specifically designed for electronics. These products are typically formulated to be free of moisture and other harmful chemicals. Avoid using compressed air intended for cleaning other household items, as these may contain additives that can harm your phone.
Inspecting the Port for Damage
After carefully cleaning your phone’s charging port, it’s crucial to inspect it for any signs of damage. This step helps ensure that the cleaning process hasn’t exacerbated any pre-existing issues and allows you to identify potential problems that might hinder charging.
Use a bright light source, such as a flashlight or desk lamp, to illuminate the inside of the port. Look closely for any of the following:
- Bent or broken pins: These delicate metal connectors are essential for establishing a connection with your charging cable. Bent or broken pins can prevent your phone from charging correctly.
- Debris that couldn’t be removed: Despite your cleaning efforts, some stubborn particles might remain lodged inside the port. Look for any lingering debris, such as pocket lint or dust.
- Corrosion or discoloration: Exposure to moisture can cause corrosion within the charging port. Look for any signs of rust, discoloration, or other unusual markings.
- Physical damage to the port itself: Check for cracks, scratches, or any other physical damage to the port’s housing.
If you notice any damage, avoid further attempts to clean the port yourself. Instead, consult a qualified technician or contact your phone’s manufacturer for professional assistance. Attempting to repair the port yourself could worsen the damage and potentially void your warranty.
Testing the Charging Functionality
After carefully cleaning your phone’s charging port, it’s crucial to test its functionality. Before plugging in your charger, visually inspect the port one last time to ensure no debris remains. Then, connect your phone to its charger using the appropriate cable.
Observe the charging indicator. This may be a battery icon on the screen, an LED light near the port, or a charging sound. If the indicator displays as expected, your cleaning efforts were successful. Allow your device to charge for a few minutes to confirm a consistent charge.
If your phone still doesn’t charge, try a different charging cable or power adapter. This helps isolate whether the issue lies with the port itself or with a faulty accessory. If a new cable and adapter don’t work, it’s possible there may be an underlying hardware issue with your device.
Common Charging Port Issues and Solutions
Even after cleaning, you might still experience charging issues. Here are some common problems and how to address them:
1. Slow Charging:
Cause: A partially obstructed port, a worn-out charging cable, or using the incorrect charger.
Solution: Double-check the port for any remaining debris. Try a different cable and charger. Ensure your charger is compatible with your device’s fast-charging capabilities.
2. Intermittent Charging:
Cause: A loose connection within the port or a damaged charging cable.
Solution: Carefully inspect the charging cable for any bends or breaks. Try a different cable. If the problem persists, the charging port itself may be damaged and require professional repair.
3. No Charging at All:
Cause: A completely blocked port, a faulty charger or cable, or a problem with the device’s internal charging circuitry.
Solution: Try a different cable and charger with a known working device. If those work, the issue lies with your original device, and you might need to consult a professional for repair.
Preventing Future Charging Port Problems
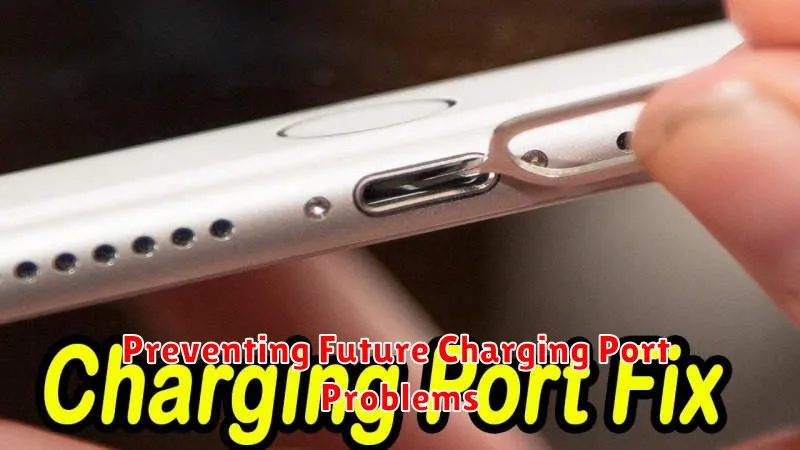
Proactive measures can significantly extend the life of your charging port and prevent future cleaning hassles. Avoid exposing your phone to excessive dust, lint, and pocket debris by using protective cases and keeping your phone in cleaner environments.
Regularly inspect your charging port for any signs of buildup. A quick visual check can help you catch problems early before they become major issues.
Use quality charging cables. Frayed or damaged cables can shed particles into the port, leading to blockages and potential damage. Consider replacing your charging cables periodically, especially if you notice any signs of wear and tear.
Avoid forcing the charging cable into the port. If you feel resistance, double-check the alignment and try again gently. Forcing the connector can bend the delicate pins inside the port.
Lastly, maintain a clean charging environment. Designate a specific spot for charging your phone, preferably one free from dust and debris.
Professional Cleaning Options
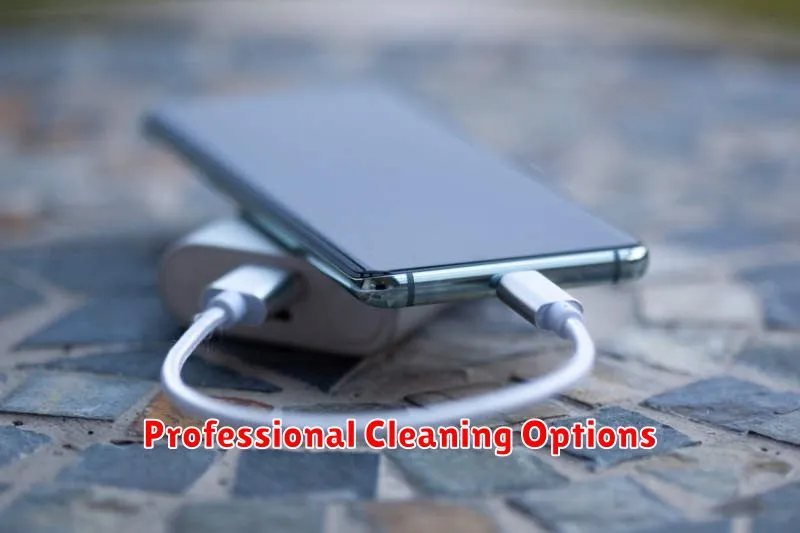
While cleaning your phone’s charging port at home is often sufficient, sometimes professional assistance is necessary. If you’ve tried the previous methods and your phone still isn’t charging correctly, or if you notice physical damage within the port, it’s time to seek expert help.
Authorized repair centers for your specific phone brand are the best option. They have specialized tools and trained technicians who can safely diagnose and repair any underlying issues. They can also determine if the problem stems from the charging port itself or a different component within the phone.
Third-party repair shops are another alternative, but it’s crucial to choose a reputable establishment. Inquire about their experience with phone repairs and ensure they use quality parts. Be sure to ask about warranties on their services.
Before taking your phone to any professional, back up your data. This precaution safeguards your information in case a factory reset is required during the repair process.